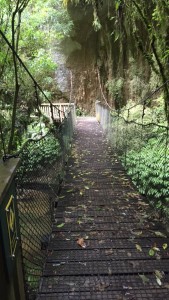
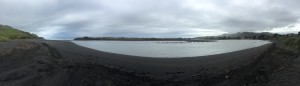
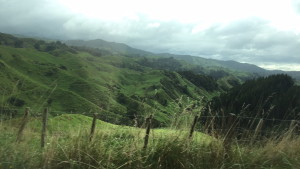
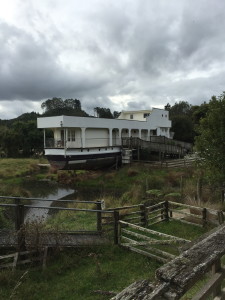
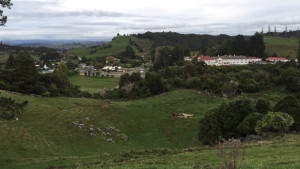
This morning we woke up early to make it to the car rental agency the minute they opened, figured out all the paperwork, then drove South to Waitomo for our Legendary Black Water Rafting tour! In the word Waitomo, “Wai” translates as water and “tomo” translates to entrance or hole, meaning the whole word translates to “steam which flows into the hole in the ground.” This area is one of New Zealand’s original tourist destinations, but is also rich in geological landscapes and cultural history. Perfect for natural born adventurers!
The Black Abyss
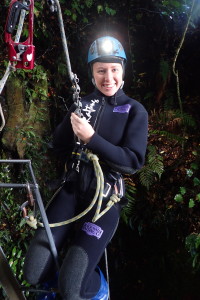
We embarked on the most extreme of tours, which included a variety activities with the Legendary Black Water Rafting Company. My friend and I joined six others, along with two tour guides, and geared up in jumpsuit/jacket/booties wetsuits, gum boots, a harness, and helmet.
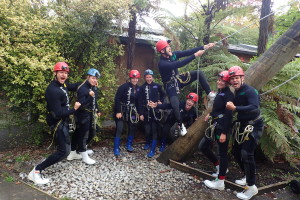
Tour group after gearing up
We drove about ten minutes down the road to an open field where they have a small training area set up, as well as the entrance to the cave. We had a short lesson on how to rappel, which is essentially using a rope to lower yourself down a cliff or slope that is too steep or dangerous to descend without gear. Also known as abseiling, this term comes from the German word “abseilen” meaning “to rope down.” The rope is threaded through a metal piece of equipment, and your thumb is used to push or release on the last small bar to control the speed. To stop, the bar is pushed all the way up, and your right hand is brought behind your back. The first challenge was abseiling down a 35 meter (115 feet) hole in the ground to the entrance of the cave system. The rock hole was shaped like an hourglass, so you enter with more space, pass through a smaller hole, then are lowered into the caverns as the space opens up a little more. We rappelled one by one until we all were at the cave’s entrance, then started are walk through the cave tunnels.
Start of abseiling into the cave
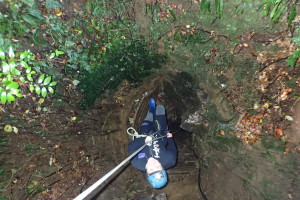
Abseiling into the cave
The Subterranean World
We had a short brief about cave walking safety and were told not to touch the stalagmites and stalactites that were millions of years old and can be easily damaged. The guides also pointed out a few fossils, and mentioned there were also wale and other fossils throughout the caves, that were over 1.2 million years old from when the area was an ocean. We crossed a section of the caves where grates were placed over cracks in the rocks, where we also connected our cow tails (basically safety ropes) to a hand rail rope until we crossed through.
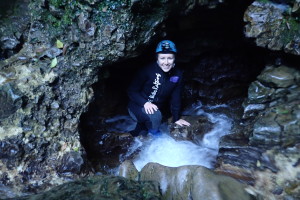
Our next challenge was called the “flying fox,” where we were sent zip lining through the pitch black, across a deep cavern in the cave. There was a rock mechanism to stop you above a large rock, and the other guide helped us down one by one. It was an incredible feeling flying the open space with no concept of what was where! The platform we were on looked out over an underground rock pool, where we dangled our feet over the edge and enjoyed a snack of hot chocolate and homemade granola bars before jumping into the icy water.
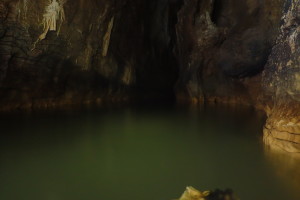
Rock pool inside the caves
Next we grabbed inner tubes, put them around our waist, and jumped off a platform into a rock pool! The reason for the insulated wet suits is because, as you can probably imagine, the water in underground caves can get pretty chilly. We paddled our way to the wall to grab the rope and pulled ourselves along the wall, and walked through some of the more shallow areas. When we all got back in the inner tubes, we linked up in a chain as one of the guides pulled us along through the water giving us a lesson on glowworms.
With our helmet lights off, the pitch black allowed us to see a ceiling of glowworms that looked like a beautiful night sky full of stars. One major feature of the Waitomo caves is that they are home to glowworms, making it an incredible sight to see. If you would like more information on glowworms, refer to my previous blog post “Mt. Tamborine.” We also got an up close and personal look at some of the glowworms and their thread formations on the cave walls along the way. It was an incredibly peaceful, yet also eerie, moment to sit back and slowly make our way through the quiet and beautiful caves.
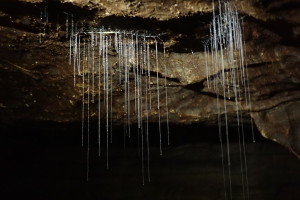
Up close look at the glowworms
Sweet As!
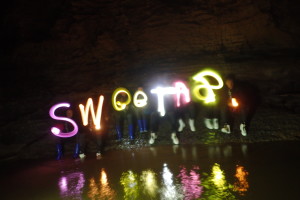
We spent time wading through the cave waters, climbing over the uneven rock surfaces, and eventually where were challenged to jump off a ledge into another rock pool. Then we came to a passageway where they gave us a hot drink and chocolate to warm our bodies up, and took a few group photos. They took one using a long exposure method so you can see the cave and the people, then had us put our translucent drink cups over the light on our helmets and each motioned a backwards letter in the air to spell out “Sweet as!” It was very cute.
Our tour guides also let us know that at that point, we were as deep into the caves as we would be experiencing for the day, at 60 meters below ground. At that specific spot the caves did get too much deeper compared to where we entered, the ground just got higher, so we were passing through the center of the mountain. The caves only go about 5 more meters deep, but still crazy to be so far below ground level!
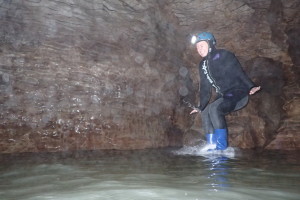
Jumping into an underground rock pool
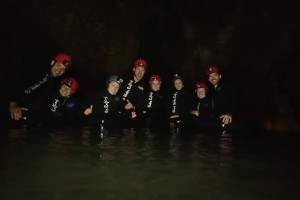
Tour group exploring the caves
Caving is Sweet As!
Underground Waterfalls
Next we slid down a small waterfall where they placed a slide to catch a photo op, and our next challenge was sliding headfirst through a small hole in the rock to get to the other cave room. I learned afterwards the larger part of the cave wrapped around if you didn’t want to attempt the crawl space method, but it was more fun that way! After exploring some more we caught a glimpse of an eel in some of the shallow water, where the guides explained that eels in the caves can grow up to two meters long and a hefty width (she motioned a size somewhere in between a football and soccer ball). We all agreed we were glad to not have known these little guys were swimming through the same water we were prior to jumping in!
Our last big challenge was rock climbing up two waterfalls. The guides instructed us step by step by pointing to rocks, until we reached a point where we were close enough to the top to just go for it. We got a short brief before the climb, but mainly it was either do it right because wrong will not end well! We climbed up one waterfall to a cave chamber where we waited for the group before walking through a short passageway, then climbing up the second waterfall.
Climbing through a small rock entrance from one room to the next
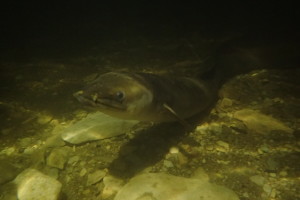
Cave eel
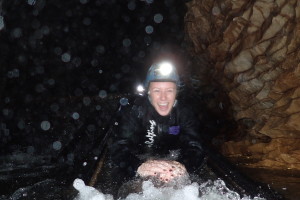
Sliding down a mini waterfall
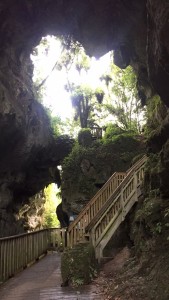
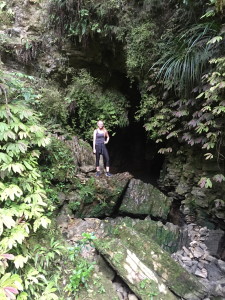
Just a few meters straight, then another few left and you could see daylight, where the caves opened up into the same field that we entered down through. The cave exit was surrounded by a lovely little waterfall and pond area, with greenery all around.
Climbing out of the caves
At the conclusion of our tour, we changed out of our gear, showered off in fantastically hot water, then ate hot soup and a bagel as we watched our slideshow of pictures from the day of caving. It was a FANTASTIC tour that I would highly recommend to anyone traveling in New Zealand. Although you do need to be relatively fit and fearless, it was by far one of the coolest things I’ve ever done. After getting everything together, we jumped back in the car and made our way to Rotorua!
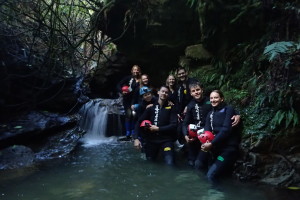
Tour group post caving adventure